
In this article, will learn the basics of VBA userforms. I will explain how to create a form in excel, how to use VBA toolbox, how to handle user inputs and finally how to store the user inputs. We will go through these topic using one example and step by step guide. If you are reading this, than I assume you know the basics of Excel VBA.
Without further delay, let’s get started.
Create A Form for Investment in Excel and Store Record
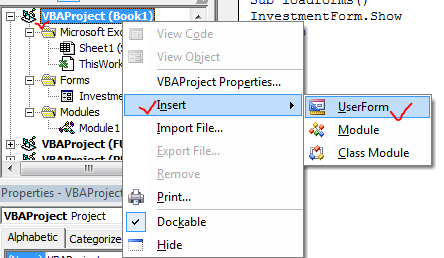
We will start by designing the user form. In this userform, we will have one textbox for name, one for age, one for investment amount and a pair of radio buttons for gender. Let’s start it.
Design the userform
The property box is shown in the lower left of the project explorer. If you can’t see it, go to view and click on Properties Window. We will be using it a lot, so make sure it is there. It is used for styling, naming and customisation of forms.

Add labels using toolbox for descriptive names. Add textbox for user inputs.
Add two radio buttons and name them Male and Female.
I have used a frame to encapsulate them, but it is not necessary.
Add command buttons submit and cancel to perform operation on given input.
I have renamed the element as below table and I will use these names to refer to them. You can have different names. Just replace these names with your name. These are VBA names (code name) that will be used in code. They will not be reflected on form.
The text you can see on labels and buttons are “Captions”. The name and caption of element can be same, if you want.
| Element | Rename |
| Name Text Box | NameBox |
| Age Text Box | AgeBox |
| Male Option Button | MaleOption |
| Female Option Button | FemaleOption |
| Investment Text Box | InvestBox |
| Submit Command Button | SubmitButton |
| Cancel Command Button | CancelButton |
Actually, user form needs trigger. It can not be shown by itself. You can use, a command button, a subroutine or an event to make form pop up on the screen.
Here I am going to use a command button to trigger user form.
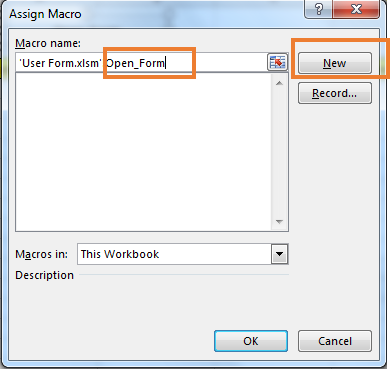
Sub Open_Form()
'Opening form
 InvestmentForm.Show
End Sub
It is done. Go back to that sheet and click on the button. The user form will pop up.
Because we have not written any vba instruction for that. We need to store user form data into sheet.
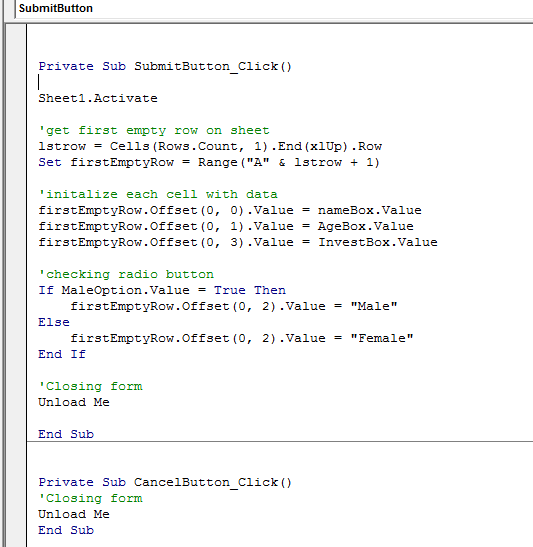
Private Sub SubmitButton_Click()

Sheet1.Activate

'get first empty row on sheet (read about it here)
lstrow = Cells(Rows.Count, 1).End(xlUp).Row
Set firstEmptyRow = Range("A" & lstrow + 1)

'initialize each cell with data
firstEmptyRow.Offset(0, 0).Value = nameBox.Value 'first cell
firstEmptyRow.Offset(0, 1).Value = AgeBox.Value 'first cell to the right
firstEmptyRow.Offset(0, 3).Value = InvestBox.Value 'third cell to the right

'checking radio button
If MaleOption.Value = True Then
    firstEmptyRow.Offset(0, 2).Value = "Male" 'second cell to the right
Else
    firstEmptyRow.Offset(0, 2).Value = "Female" 'second cell to the right
End If

'Closing form
Unload Me

End Sub
The above snippet of VBA code runs when submit button is clicked. It finds the first empty row on the sheet and fills it with values provide in form. And in the end it closes the form by using command “Unload Me”.

Double click on the cancel command button in VBA editor. A new sub will be created. Just write this line of code to close the user form.
Private Sub CancelButton_Click()
 'Closing form
  Unload Me
End Sub
Finally the form code will look like this.
And that’s it. This is how you use excel vba userform to get input from users. In this article, we just explored the basic use of userform, so that you get familiar with it. It is simple, if you have knowledge of basic vba.
In future articles, we will explore more advanced functionalities of vba userforms in Excel. We will create userform in excel to do a lot more. We will explore different tools and elements available to vba userform. Till then practice this. You can download this file for reference if you want.
So yeah guys, this was a small and simple userform tutorial. I hope it was resourceful. Let me know if you have any doubts regarding this, let me know in the comments section below.
Related Articles
Change the value/content of several UserForm-controls using VBA in Excel
Prevent a userform from closing when the user clicks the x-button by using VBA in Excel
Return the cells referenced by user using RefEdit control of userform in Excel
Popular Articles:
The VLOOKUP Function in Excel
The applications/code on this site are distributed as is and without warranties or liability. In no event shall the owner of the copyrights, or the authors of the applications/code be liable for any loss of profit, any problems or any damage resulting from the use or evaluation of the applications/code.


