In this article, we will learn How to Color Sheet Tabs in Excel.
How to edit format tab color?
Introduction to Excel worksheet workbook, Here we are going to address a basic problem which is changing the colour format of the sheet tabs. Usually when we open a sheet, Excel shows us the default naming of sheets as Sheet1, Sheet2 and Sheet3. Or when we add a new sheet, it will be default named too. Excel doesn't ask for the naming of the sheet before editing it. You have to edit it yourself manually Let's understand this with an example shown below.
Change color tab option in Excel
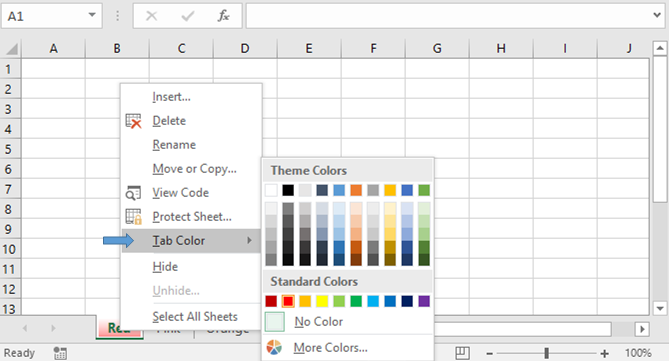
To change or apply any color to the sheet tab. It will get on the background of the tab. Right Click on the tab and Select Tab color > Choose the color.
Example :
All of these might be confusing to understand. Let's understand how to use the function using an example. Here we have some tabs to change color in the worksheet. Now we will learn how to edit the color of these tabs. Right click on the tab which you want to change the format of.

Select the Tab Color option, Theme colors will open up. Select the type of color you like to select.

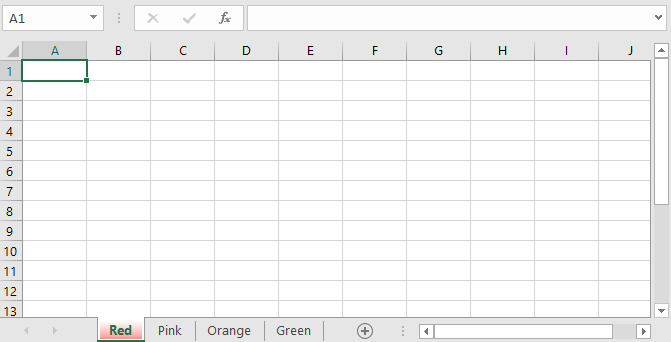
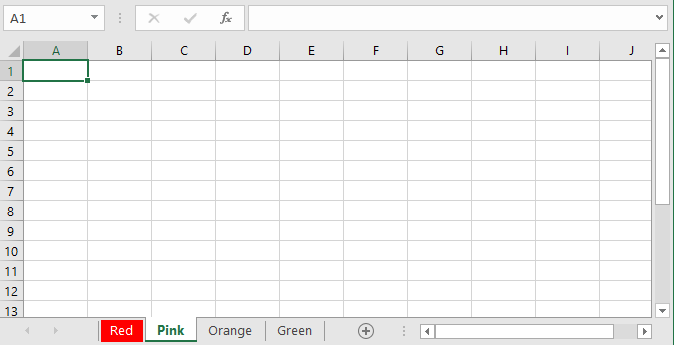
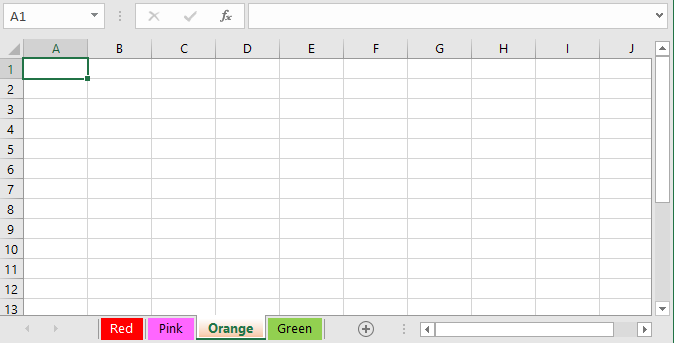
If you are working on this sheet, Tab will be displayed like the image shown above. As you switch to any other tab the tab will appear colored as shown below.

Now perform the task wherever it's required.

Naming sheets and coloring makes the sheet easy to understand.
Here are all the observational notes using the formula in Excel
Notes :
Hope this article about How to Color Sheet Tabs in Excel is explanatory. Find more articles on calculating values and related Excel formulas here. If you liked our blogs, share it with your friends on Facebook. And also you can follow us on Twitter and Facebook. We would love to hear from you, do let us know how we can improve, complement or innovate our work and make it better for you. Write to us at info@exceltip.com.
Related Articles :
All About Excel Named Ranges : excel ranges that are tagged with names are easy to use in excel formulas. Learn all about it here.
The Name Box in Excel : Excel Name Box is nothing but a small display area on top left of excel sheet that shows the name of active cell or ranges in excel. You can rename a cell or array for references.
How to Get Sheet name of worksheet in Excel : CELL Function in Excel gets you the information regarding any worksheet like col, contents, filename, ..etc.
How to use Dynamic Named Ranges in Excel : A dynamic name range is a name used for the array or range that expands and shrinks according to data. Learn more about dynamic named ranges here.
How to Create Drop Down List with Color in Excel : Add colors to the drop down list in Excel using Conditional formatting and data validation.
Join first and last name in excel : Join two or more values or names using the CONCATENATE function or & operator. This article explains how to add two or more cells in Excel.
How to disable Scroll Lock in Excel : Arrow keys in excel move your cell up, down, Left & Right. But this feature is only applicable when Scroll Lock in Excel is disabled.
Scroll Lock in Excel is used to scroll up, down, left & right your worksheet not the cell. So this article will help you how to check scroll lock status and how to disable it?
Popular Articles :
How to use the IF Function in Excel : The IF statement in Excel checks the condition and returns a specific value if the condition is TRUE or returns another specific value if FALSE.
How to use the VLOOKUP Function in Excel : This is one of the most used and popular functions of excel that is used to lookup value from different ranges and sheets.
How to use the SUMIF Function in Excel : This is another dashboard essential function. This helps you sum up values on specific conditions.
How to use the COUNTIF Function in Excel : Count values with conditions using this amazing function. You don't need to filter your data to count specific values. Countif function is essential to prepare your dashboard.
The applications/code on this site are distributed as is and without warranties or liability. In no event shall the owner of the copyrights, or the authors of the applications/code be liable for any loss of profit, any problems or any damage resulting from the use or evaluation of the applications/code.