
In this article, we will learn How to validate time entries which contain specific hours, specific minutes or specific time using data validation in excel.
Data validation
Data validation tool restricts the user to input data to ensure its accuracy and consistency in Excel. It helps in the consistency of the data. It guides the user to input the type of option which is necessary for your worksheet. Validation of text entries which contain specific substring is done with the use of Excel formula. Following steps will be a guide, how to validate text entries having specific criteria.
How to solve the problem?
Here we have a task that only allows time entries containing specific Hour, specific minute or specific Second. So we need to focus on one condition. Match with
the given value.
The use of functions and a tool will help us get through the problem.
Data Validation time in Specific Hour
We will construct a formula out of it. First the time entry would be checked for the specific Hour using the Hour function.
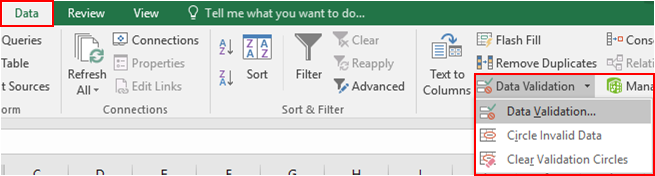
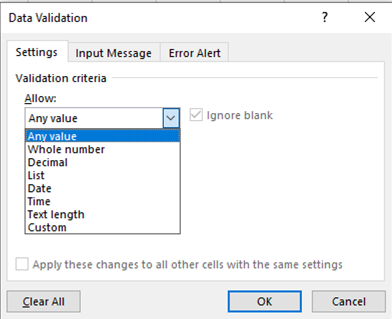
Use the formula in Data Validation tool
cell : cell value where specific time entry to be checked
Hour_value : entry to be checked with specific Hour value
Example:
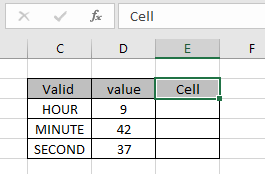
All of these might be confusing to understand. So, let's test this formula via running it on the example shown below. Here we will apply data validation on the cell to restrict the user to input any value which doesn't satisfy the mentioned condition.
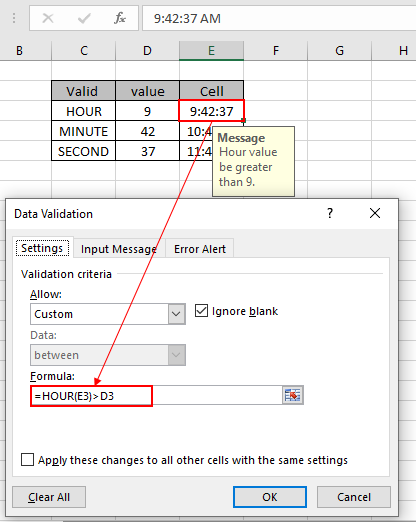
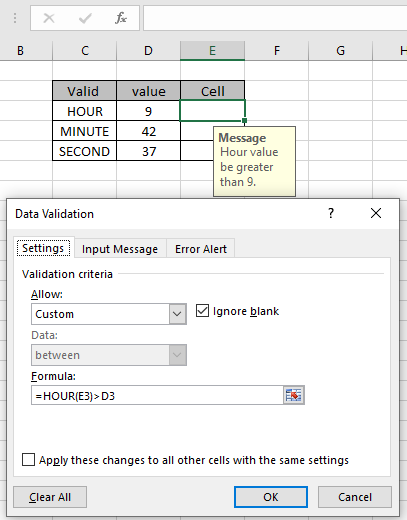
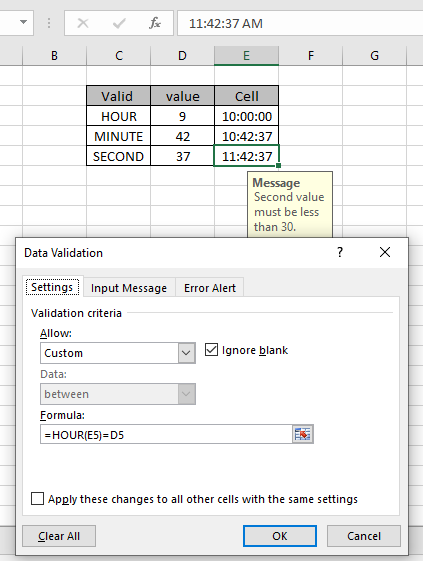
Assume the cell is in E3 cell and a specific Hour is greater than 9 to check. So we need to lock this input cell with formula in data validation tool. Now we learn how to do it. Follow the steps to do the same:
Explanation:
The formula in E3 cell looks like as shown in the image below.
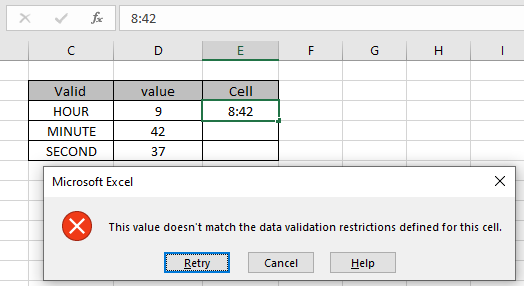
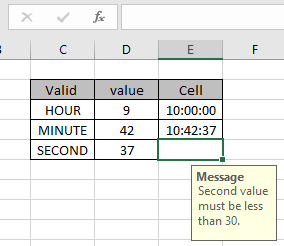
The value to check and the value to be checked with are given as cell reference. As I entered a time value which doesn't satisfy the condition, error is displayed as shown below. An error is generated "This value doesn't match the data validation restrictions defined for this cell".
But as we input the correct input time, then it just accepts the value as shown below.

As shown above Message is displayed to let the user know what kind of data value the input cell accepts. But now the problem is how the user knows what restrictions are there and what type of value the cell can accept. Now you can customize the error alert and input message to let the user know what the cell accepts.

The input message display as shown above.
Data Validation time in Specific Minute value
We will construct a formula out of it. First the time entry would be checked for the specific minute using the minute function.
Use the formula in Data Validation tool
cell : cell value where specific time entry to be checked
minute_value : entry to be checked with specific minute value
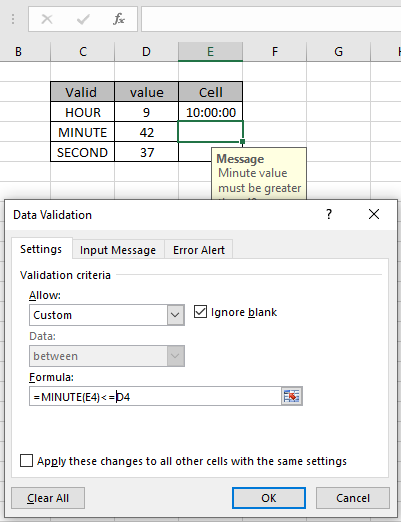
Perform the same task for the Specific minute as shown above. Display input message and error alert.
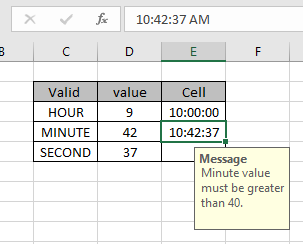
As you can see, the cell accepts the right time entry as minute value is within given condition bound..
Data Validation time in Specific Second value
We will construct a formula out of it. First the time entry would be checked for the specific time using the SECOND function.
Use the formula in Data Validation tool
cell : cell value where specific time entry to be checked
Second_value : entry to be checked with specific Second value
Perform the same task for the Specific minute as shown above. Display input message and error alert.
As you can see, the cell accepts the right time entry. The formula checks the particular field not the whole time value. To compare the whole time value just compare the input cell with value to match.
Here are all the observational notes regarding using the formula.
Notes:
Hope this article about how to do Data validation with specific Hour, minute, Second in excel is explanatory. Find more articles on Date & Time functions here. If you liked our blogs, share it with your friends on Facebook. And also you can follow us on Twitter and Facebook. We would love to hear from you, do let us know how we can improve, complement or innovate our work and make it better for you. Write us at info@exceltip.com
Related Articles:
Data Validation in Excel : restricts user to input value manually in Excel.
Way to use Vlookup function in Data Validation : allow values from the vlookup table in Excel.
Restrict dates using Data Validation : allow date values in the cell which lays within Excel date format.
How to give the error messages in Data Validation : customize your data validation cell with error messages.
Create Drop Down Lists in Excel using Data Validation : restricts users to input data manually.
Popular Articles:
50 Excel Shortcut to Increase Your Productivity : Get faster at your task. These 50 shortcuts will make you work even faster on Excel.
How to use the VLOOKUP Function in Excel : This is one of the most used and popular functions of excel that is used to lookup value from different ranges and sheets.
How to use the COUNTIF function in Excel : Count values with conditions using this amazing function. You don't need to filter your data to count specific values. Countif function is essential to prepare your dashboard.
How to Use SUMIF Function in Excel : This is another dashboard essential function. This helps you sum up values on specific conditions.
The applications/code on this site are distributed as is and without warranties or liability. In no event shall the owner of the copyrights, or the authors of the applications/code be liable for any loss of profit, any problems or any damage resulting from the use or evaluation of the applications/code.


