In this article, we will learn How to validate data in Excel 2016.
Data validation tool restricts the user to input data to ensure its accuracy and consistency in Excel. It helps in the consistency of the data. It guides the user to input the type of option which is necessary for your spreadsheet.
We can custom restrict our cell using Data validation tool. There are three options under the data validation.
Data validation Settings option can be customized as per the requirement. It offers you different types of option to use as per the condition required over the cell.
Let's understand these options one by one as shown below.
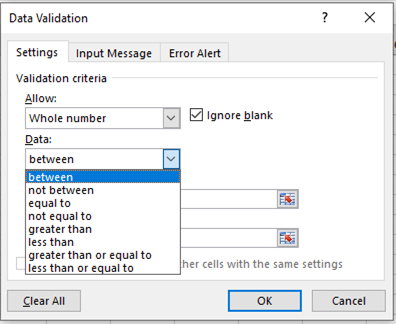
1. Validate Integer numbers : select the whole number option and choose the condition after.

2. Validate decimal numbers : select the decimal option and choose the condition after.

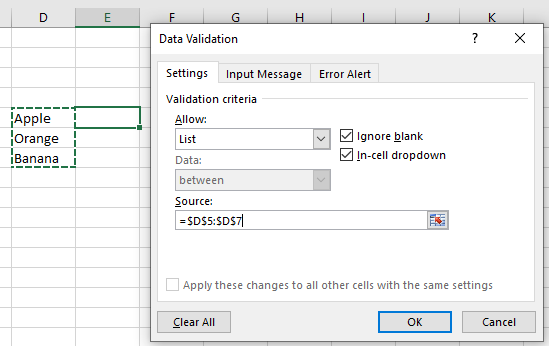
3. Validate list values : restrict the user to allow from the pre mentioned list values only. List values is given as cell reference.

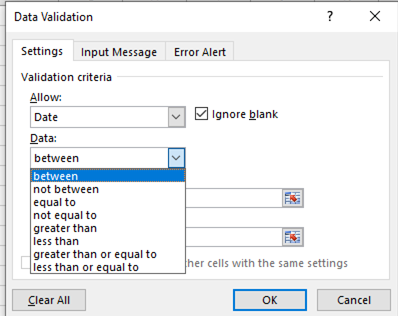
4. Validate date values : Excel has a set date format, validate only date values using Date option and choose the condition from later list.

5. Validate Time values : Excel has a set Time format, validate only TIme values using Time option and choose the condition from later list.

6. Validate the Text length values : Restricts the user to apply a condition on the length of the input text value using the Text length option.

7. Validate Values using the formula condition : Customize the input cell value using the logic condition over the cell using the Custom option. The Formula must return True or False.

Let's get a glimpse understanding of Data validation tool via testing an example. Here we used an example over text value.
Here we have a list of Department and we need to fill the department ID manually. ID must have a specific substring "DT".

But we need to lock this input cells with some rules. Now we learn how to do it.
We will use the data validation attribute of excel. Follow the steps to do the same:


Explanation:
FIll the details as shown below and Click OK

Now when I enter the value as shown below. A default error generates.

As you can see an error is generated "This value doesn't match the data validation restrictions defined for this cell".
But now the problem is how the user know what restrictions are there and what type of value can the cell accept.
So for this, we will customize some changes as shown below.

In Input Message option, type the details under Title & Input Message box as shown above.

In Error alert option, type the details under Title & Error Message box as shown above.
Click Ok.

A message is displayed when the cell is selected And an error message is displayed as shown below.

Now fill the right answers, to complete the table.
To copy the data validation rule to the required cells use the drag down or drag right option in excel.

As you can see, our table is complete. Now its user friendly and informative as well.
Hope you learned how to do Data Validation in Excel 2016. Excel lets you to work on these tools in Excel 2013 and 2010. Learn more content on Data Validation here. Please share your any unresolved query in the comment box below. We will help you.
Related Articles:
Data Validation in Excel : restricts user to input value manually in Excel.
Way to use Vlookup function in Data Validation : allow values from the vlookup table in Excel.
Restrict Dates using Data Validation : allow dates in the cell which lays within Excel date format.
How to give the error messages in Data Validation : customize your data validation cell with error messages.
Create Drop Down Lists in Excel using Data Validation : restricts user to input data manually.
Popular Articles
50 Excel Shortcut to Increase Your Productivity
The applications/code on this site are distributed as is and without warranties or liability. In no event shall the owner of the copyrights, or the authors of the applications/code be liable for any loss of profit, any problems or any damage resulting from the use or evaluation of the applications/code.