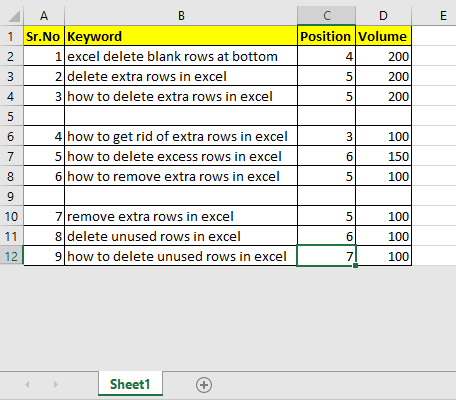
Deleting unused blank rows from a sheet can help you reduce file size significantly and make your dashboard cleaner. In this article we will learn the ways you can delete unused rows from a worksheet fast.
We will discuss these methods for deleting rows in this article:
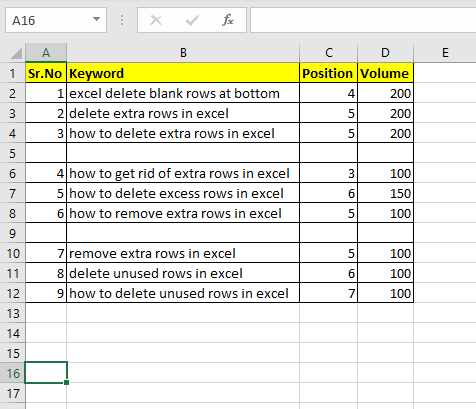
Here we have a data table. The rows below the 12th row are unused and I would like to delete these rows and the data if they contain any. To do so, I select the 13th row and press CTRL+SHIFT +DOWN Arrow key. Keep this combination pressed until you reach the last row in the sheet.
Now press the CTRL+SHIFT+SPACE key combination. This will select the entire row of selected cells.
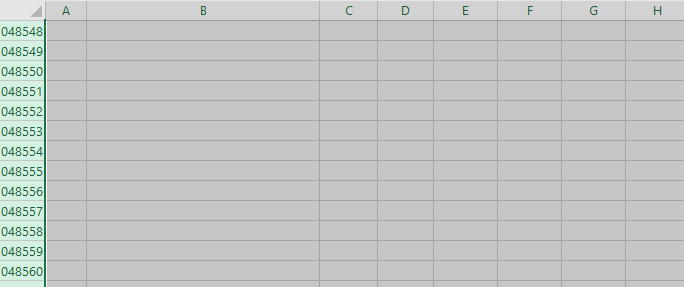
Now press CTRL+ - (CTRL and Minus) key combination. This will delete the entire rows.
Learn 50 Excel Shortcuts to Increase Your Productivity.

In the above table, we can see some blank rows. In this example, we have only 2 blank rows, which can be deleted manually. In real data you may have thousands of rows with hundreds of random unused rows. In such cases deleting blank rows can be a major issue. But don't worry, we got it covered. You can delete unused rows in one go.
Follow these steps to delete all unused rows from the data table:
Select the entire main column by which you want to delete blank rows. I select the D column in Table because if there is no volume of the keyword, that row is useless to me.
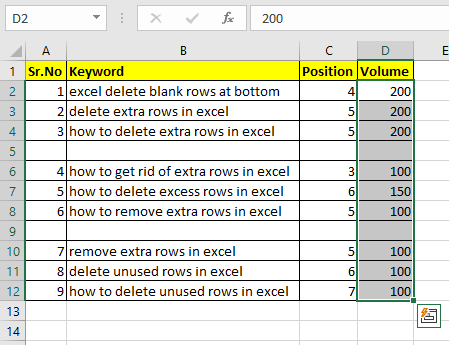
Now press CTRL+G combination to open the Go-To dialog.
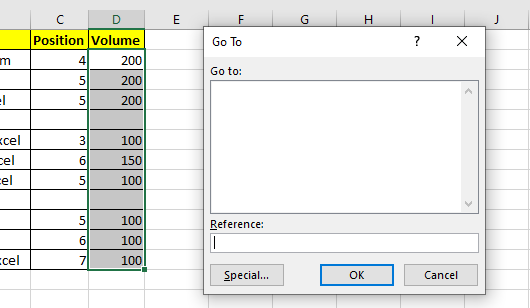
You can see a "Special" button at the bottom left corner. Click on it.

This is Go To special dialog. You can open it from Home --> Editing --> Find --> Select --> Go To Special option too.

Find the "Blank" option button. Click on it and hit OK.
Excel will select the blank cells in that column.
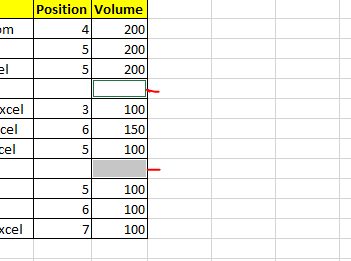
Now hit CTRL+SHIFT+SPACE to select entire rows of selected cells. It will select the entire row. Now hit the CTRL + - key combination to delete the selected rows.
It happens many times that we go far down in the sheet to do some rough work. After doing that rough work in a cell or row or column, we delete the data. Now we expect excel to forget that. But excel doesn't forget easily.
Let's say if you write "Hi" in cell A10000. You go back to cell A2 and write something there, say "Hello Exceltip.com". Now go back to A10000 and delete the content from there. Back to A1.
Now if you press CTRL+END , the cursor will move to cell A1000. Even if you delete that row. Nothing will work. Excel will remember the cell and it will consider it in used range.
To reset it, we use this code line in VBA.
Worksheet.UsedRange
Here's how you use it.
Press Alt + F11 to open the VB Editor.
Write this in any module or worksheet.
Sub test()
  ActiveSheet.UsedRange
End Sub
Run this and you will have your used range reset. Now if you hit CTRL+End shortcut. It will take you to the last cell that has data in it.

Alternative to sub
You can also use the immediate window to reset the used range and ignore used rows and columns.
To open an immediate window, go to the view menu and find an immediate window. Click on it and you will have it below in VBE. The immediate window is used to debug code but you can use it to run small chunks of code without saving them.
In the Immediate window, write this line "Activesheet.usedrange" and hit the enter button. Nothing will reflect this but the work is done. Go to the activesheet.

If you want to delete the unused rows so that they aren't visible for the sake of the dashboard. Then deleting the rows won't work in this new version. Every time you delete rows, new rows will take place (only for viewing, they don't have weight).
So to delete rows at the bottom of the sheet, so that they don't appear on the sheet, we hide them.
Select the first empty cell after the used range and use the shortcut CTRL+SHIFT+DOWN key to select the entire column below the used range. Now hit CTRL+SHIFT+SPACE to select the entire row.
Right now click on the selected rows.

Find the hide option. Click on it. This will hide all the rows below the used range. Now no one can edit in those rows.

You can see that all the unused at the bottom of the sheet are gone.
Related Article
Delete drop down list in Excel: The dropdown list is used to restrict the user to input data and gives the option to select from the list. We need to delete or remove the dropdown list as the user will be able to input any data instead of choosing from a list.
Deleting All Cell Comments in Excel 2016 : Comments in Excel to remind ourselves and inform someone else about what the cell contains. To add a comment in a cell, Excel 2016 provides the insert Comment function. After inserting the comment it is displayed with little red triangles.
How to Delete only Filtered Rows without the Hidden Rows in Excel: Many of you are asking how to delete the selected rows without disturbing the other rows. We will use the Find & Select option in Excel.
How to Delete Sheets Without Confirmation Prompts Using VBA In Excel: There are times when we have to create or add sheets and later on we find no use of that sheet, hence we get the need to delete sheets quickly from the workbook. This
Popular Articles:
50 Excel Shortcuts to Increase Your Productivity | Get faster at your task. These 50 shortcuts will make you work even faster on Excel.
How to use Excel VLOOKUP Function| This is one of the most used and popular functions of excel that is used to lookup value from different ranges and sheets.
How to use the Excel COUNTIF Function| Count values with conditions using this amazing function. You don't need to filter your data to count specific values. Countif function is essential to prepare your dashboard.
How to Use SUMIF Function in Excel | This is another dashboard essential function. This helps you sum up values on specific conditions.
The applications/code on this site are distributed as is and without warranties or liability. In no event shall the owner of the copyrights, or the authors of the applications/code be liable for any loss of profit, any problems or any damage resulting from the use or evaluation of the applications/code.